.svg)
Adding and customizing fields in Enpass Items
Enpass Items are highly customizable: Add extra URLs, make your own contact fields, change the names and field types, mask sensitive content, reorder fields and section headers — just about anything you want. Password fields have additional customization options.
Desktop
To add a new field to an Item in Enpass for desktop:
-
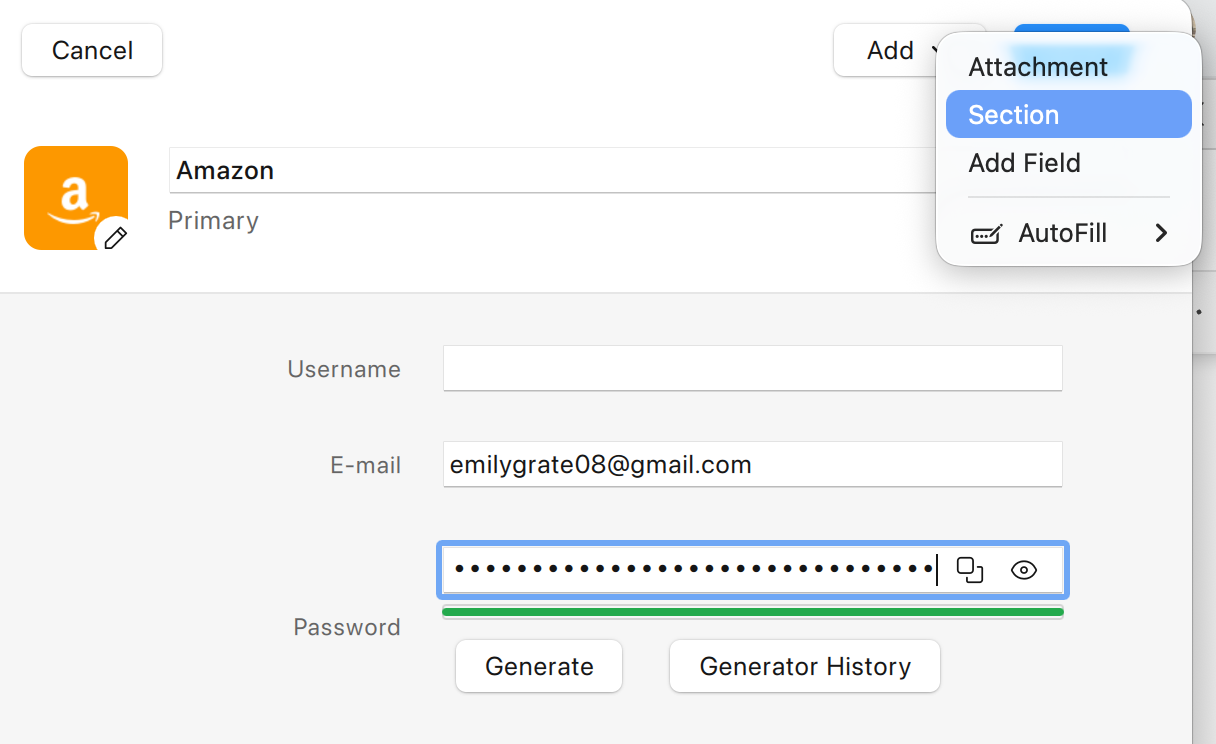
In the Item Details view, click

-
Click the Add Field button.

-
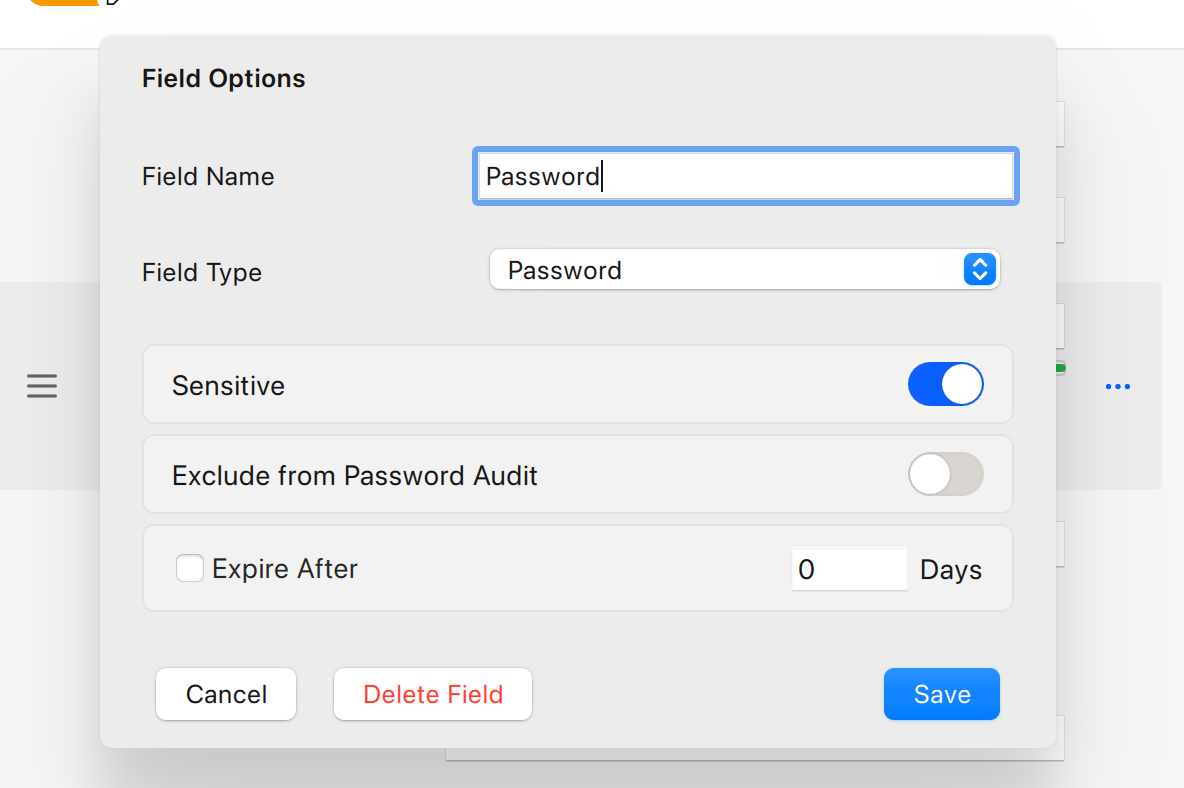
Click Field Name to customize the field.
-
Give your field a name, and select a field type from the drop-down.
-
Select the Sensitive checkbox if you want the content of this field to be private.
-
Click Save to close the field-edit overlay.
-
Click Save in the toolbar to update your Item.
To reorder fields or sections:
-
In the Item Details view, click
-
Drag the ≡ icons beside the fields and sections to reposition them.
-
Click Save in the toolbar to update your Item.
To change a field’s name or function:
-
In the Item Details view, click
-
Click the 3 dots icon in front of the field name.
-
Enter a new field name or choose a new field type from the drop-down list.
-
Select the Sensitive checkbox if you want the content of this field to be private.
-
Click Save to close the field-edit overlay.
-
Click Save in the toolbar to update your Item.
To add a new section:
-
In the Item Details view, click
-
Click the Add Section button.
-
Click the new section header to give it name.
-
To reposition the section, click and drag the ≡ icon beside the section header.
-
To add new fields within your new section, click

-
Click Save in the toolbar to update your Item.
To delete a field:
-
In the Item Details view, click
-
Click the name of the field that you want to delete.
-
Click Delete
-
Click Save to update your Item.
iOS
To add a new field to an Item in Enpass for iOS:
-
In the Item Details view, tap Edit.
-
In the section where you want your new field, tap

-
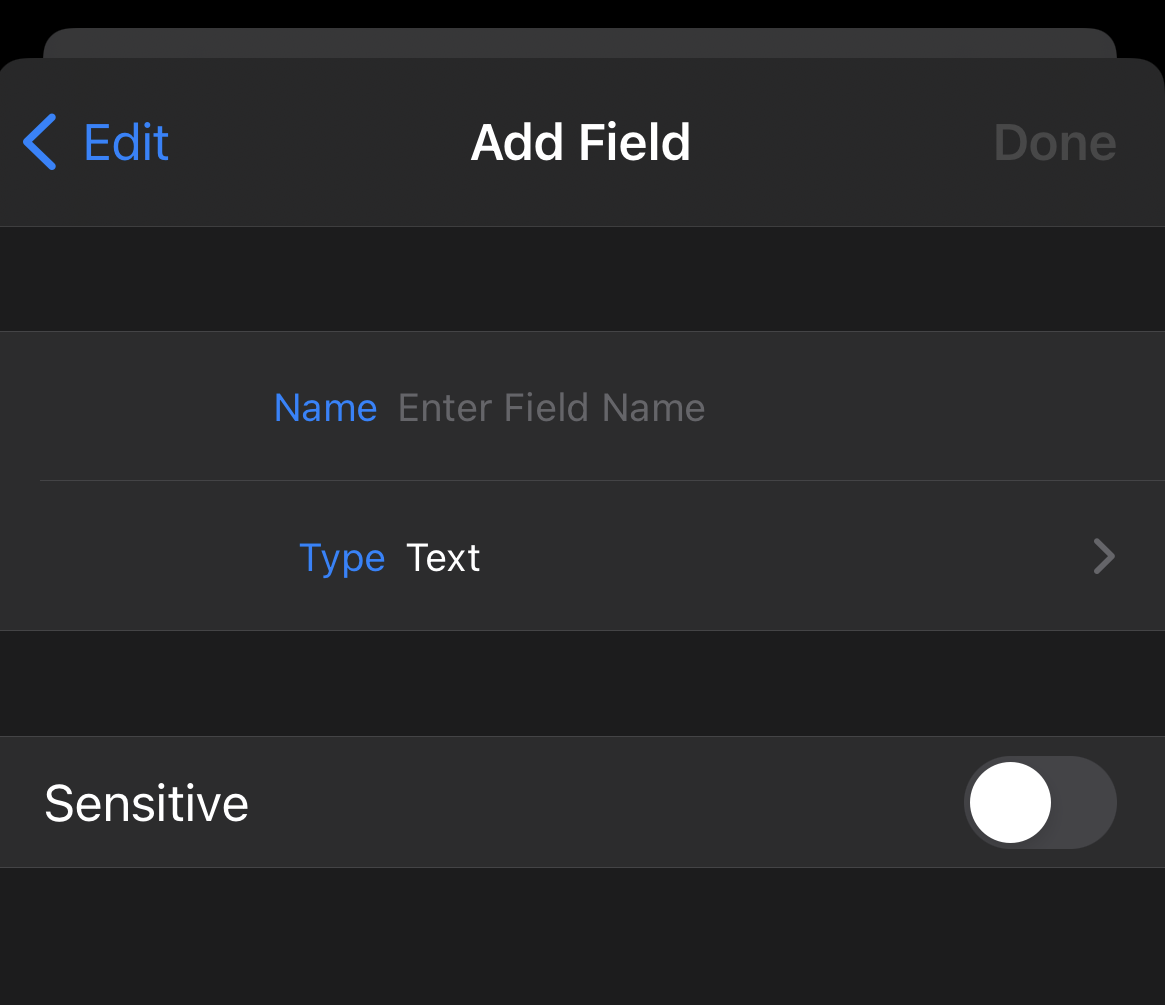
Enter a name for your new field, then tap > to select a field type.
-
Turn on the Sensitive option if you want the content of this field to be private.
-
Tap Done to finish adding your new field.
-
Tap Save in the Item Details view to save your changes.
To reorder fields or sections:
-
In the Item Details view, tap Edit.
-
Scroll down and tap ≡ Reorder Fields.
-
Drag the ≡ icons beside the field and section names to reposition them.
-
Tap Done when finished.
-
Tap Save in the Item Details view to update your Item.
To change a field’s name or function:
-
In the Item Details view, tap Edit.
-
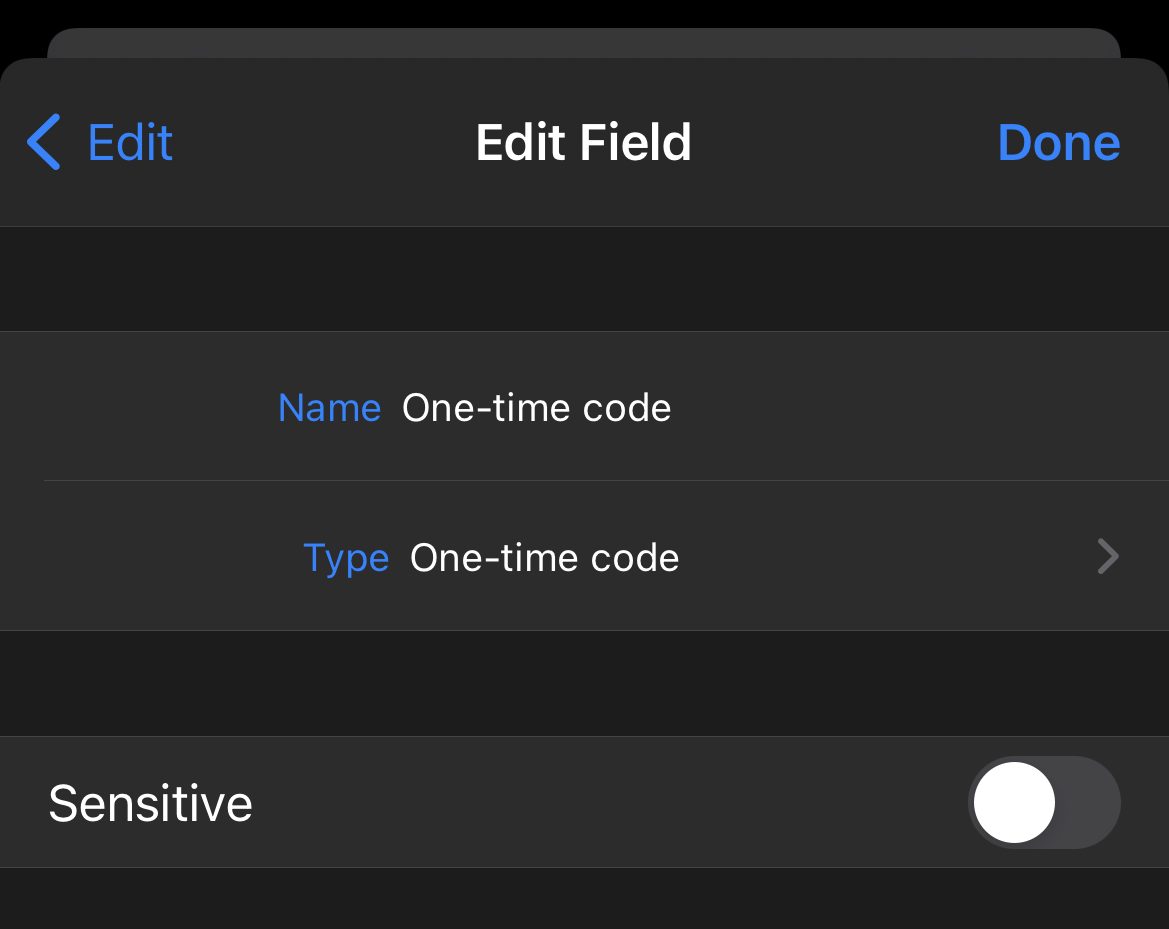
Tap the name of the field that you want to edit.
-
Enter a new name for the field, and/or tap ❯ to select a new field type.
-
Turn on the Sensitive option if you want the content of this field to be private.
-
Tap Done to finish editing the field.
-
Tap Save in the Item Details view to update your Item.
To add a new section:
-
In the Item Details view, tap Edit.
-
Scroll down and tap
-
Enter a name for the new section, and tap Done.
-
Tap ≡ Reorder Fields to reposition your new section.
-
Tap Save to update your Item.
To delete a field:
-
In the Item Details view, tap Edit.
-
Tap the name of the field that you want to delete.
-
Tap Delete Field, then tap Delete in the warning pop-up.
-
Tap Save to update your Item.
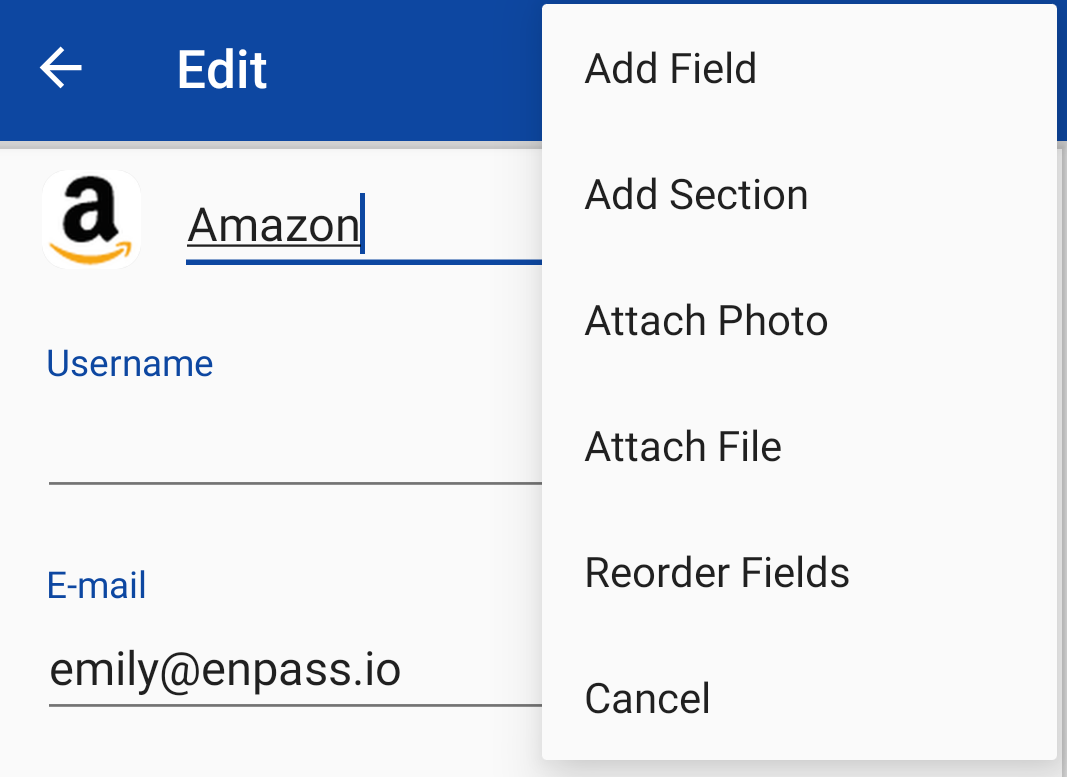
Android
To add a new field to an Item:
-
In the Item Details view, tap
-
In the Edit view, tap

-
Enter a name for your new field, and select a field type from the drop-down.
-
Turn on the Sensitive option if you want the content of this field to be private.
-
Tap Save to add your new field to your Item.
-
Tap Save to update your Item.
To reorder fields or sections:
-
In the Item Details view, tap
-
In the Edit view, tap
-
Drag the ≡ icons beside the fields to reposition them.
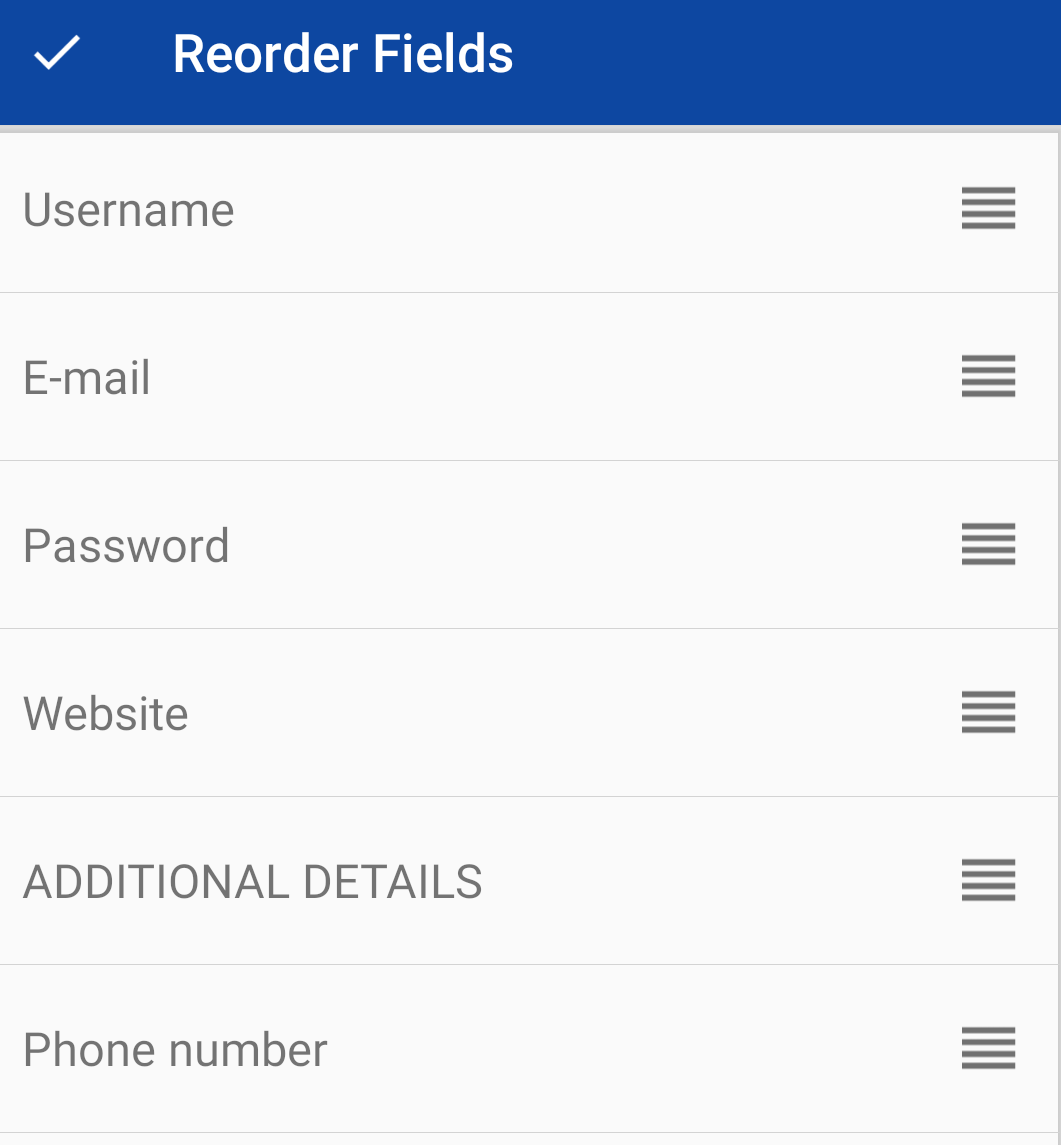
-
Tap ✔ when finished.
-
Tap Save in the Item Details view to update your Item.
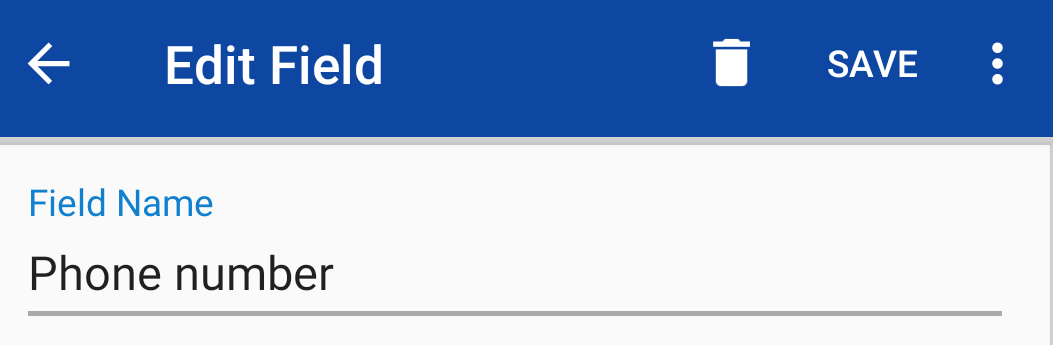
To change a field’s name or function:
-
In the Item Details view, tap
-
Tap the name of the field that you want to edit.
-
Enter a new field name or choose a new field type from the drop-down list.
-
Turn on the Sensitive option if you want the content of this field to be private.
-
Tap Save to finish editing the field.
-
Tap Save in the Item Details view to save your changes.
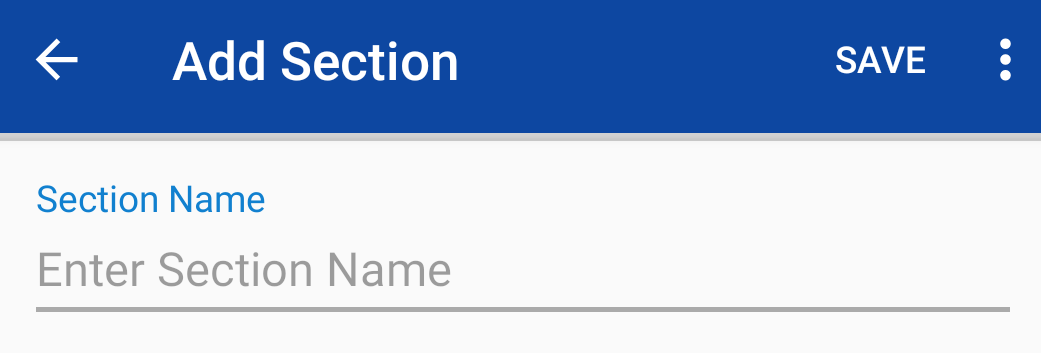
To add a new section:
-
In the Item Details view, tap
-
In the Edit view, tap
-
Enter a name for your new section and tap Save.
-
To add fields to your new section, tap
-
To reposition section or fields, tap
-
Tap Save in the Item Details view to save your changes.
To delete a field:
-
In the Item Details view, tap
-
Tap the name of the field that you want to delete.
-
Tap Delete icon (trash can), then tap Delete in the warning pop-up.
-
Tap Save in the Item Details view to save your changes.