.svg)
By default, policies set in the Admin Console apply to every user in your organization. Group policies let you override those defaults for specific teams or user groups, so you can enforce stricter rules where needed and allow more flexibility where it makes sense.
How Group Policies Work
Organization-level policies are the baseline. When you override a policy for a specific group, that group's members follow the overridden setting instead of the organization default. Any policy you don't override for a group continues to follow the organization default.
For example, you might keep vault exports disabled for the entire organization, but temporarily create an override for your IT admin group that allows exports for data migration purposes.
Setting Up a Group Policy Override
-
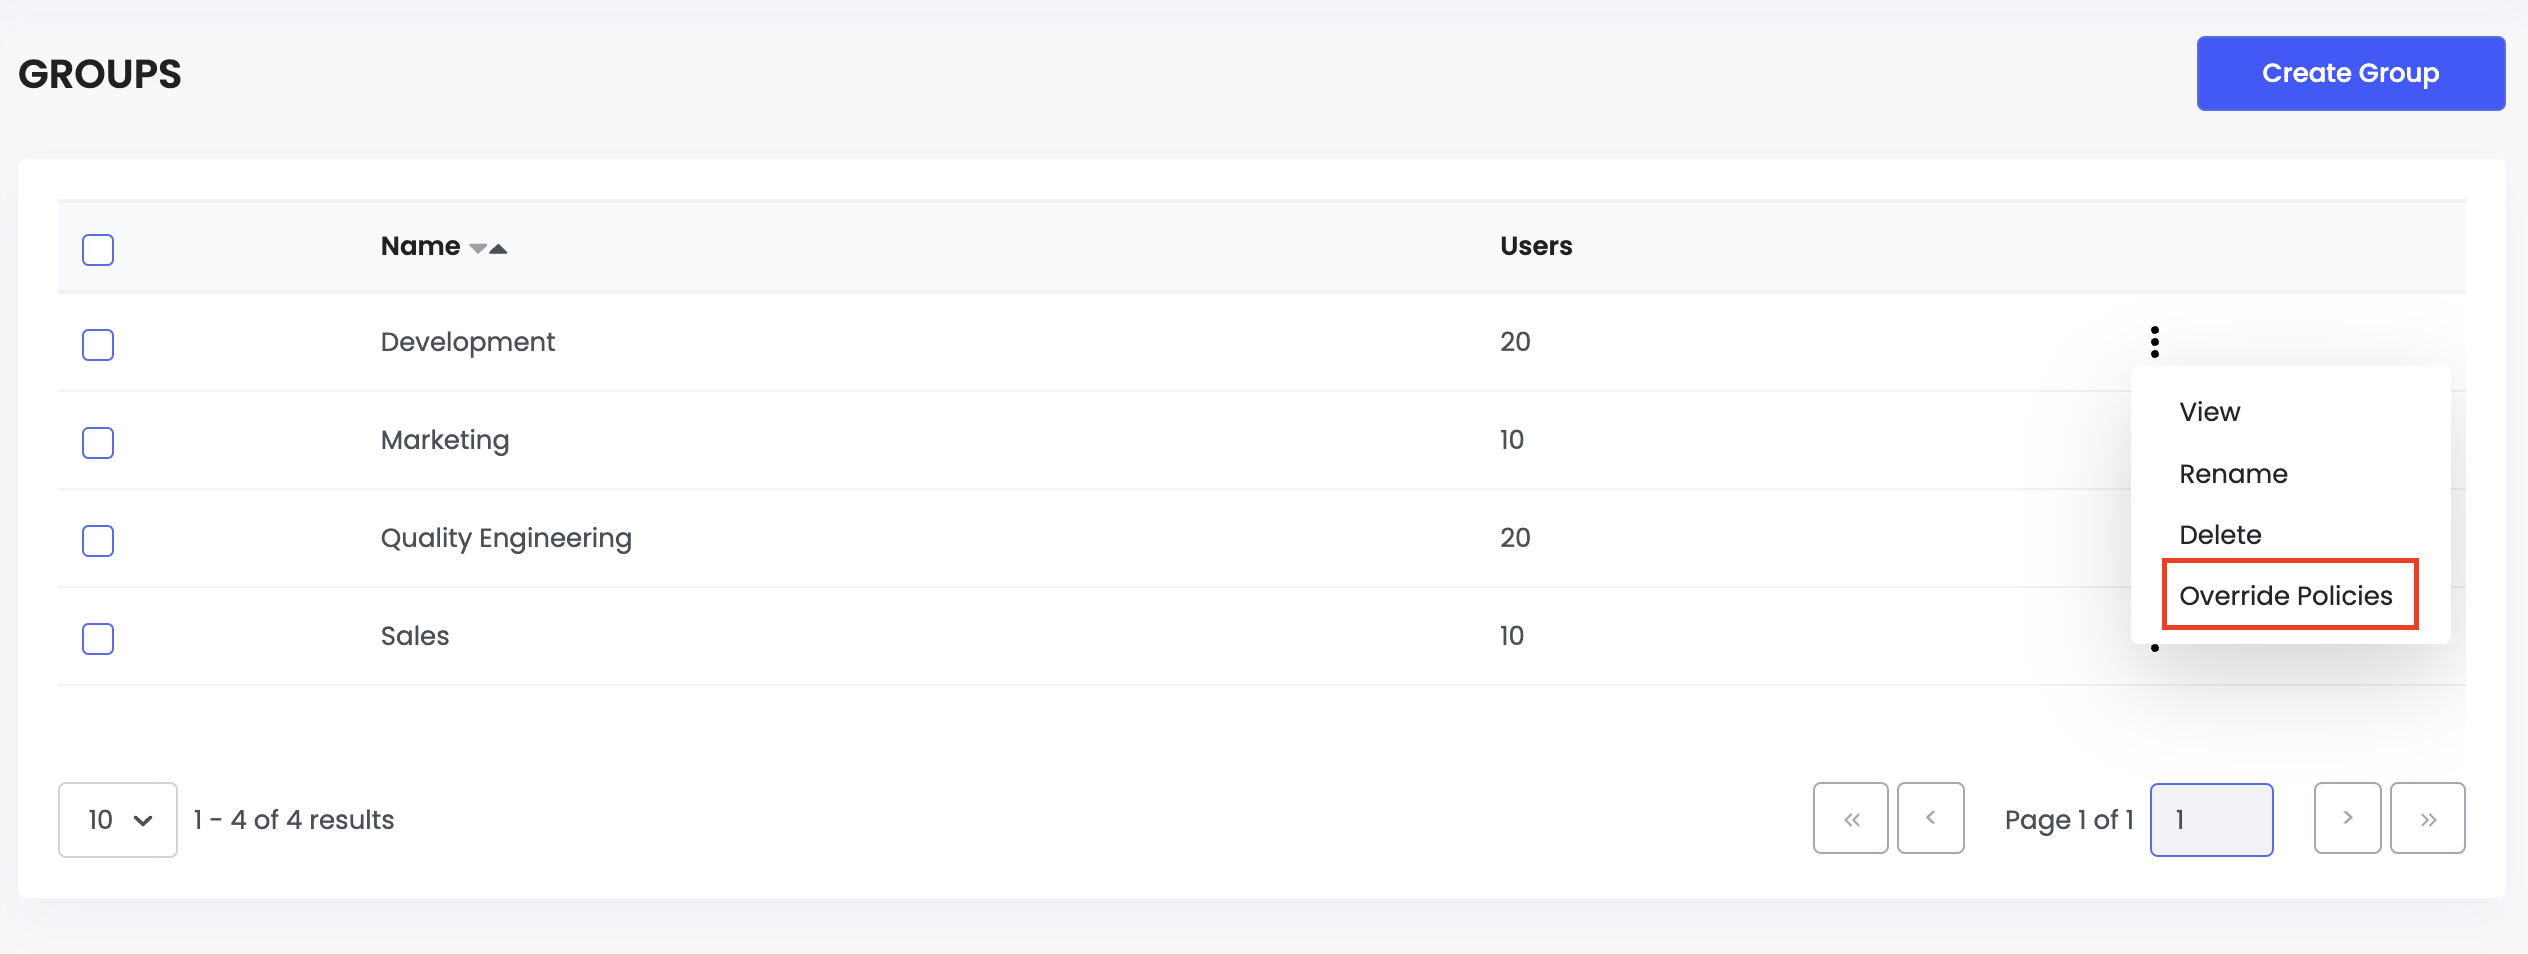
In the Admin Console, navigate to Groups in the left sidebar.
-
Find the group you want to configure and click the three-dot menu (⋮) next to it.
-
Select Override Policies.
-
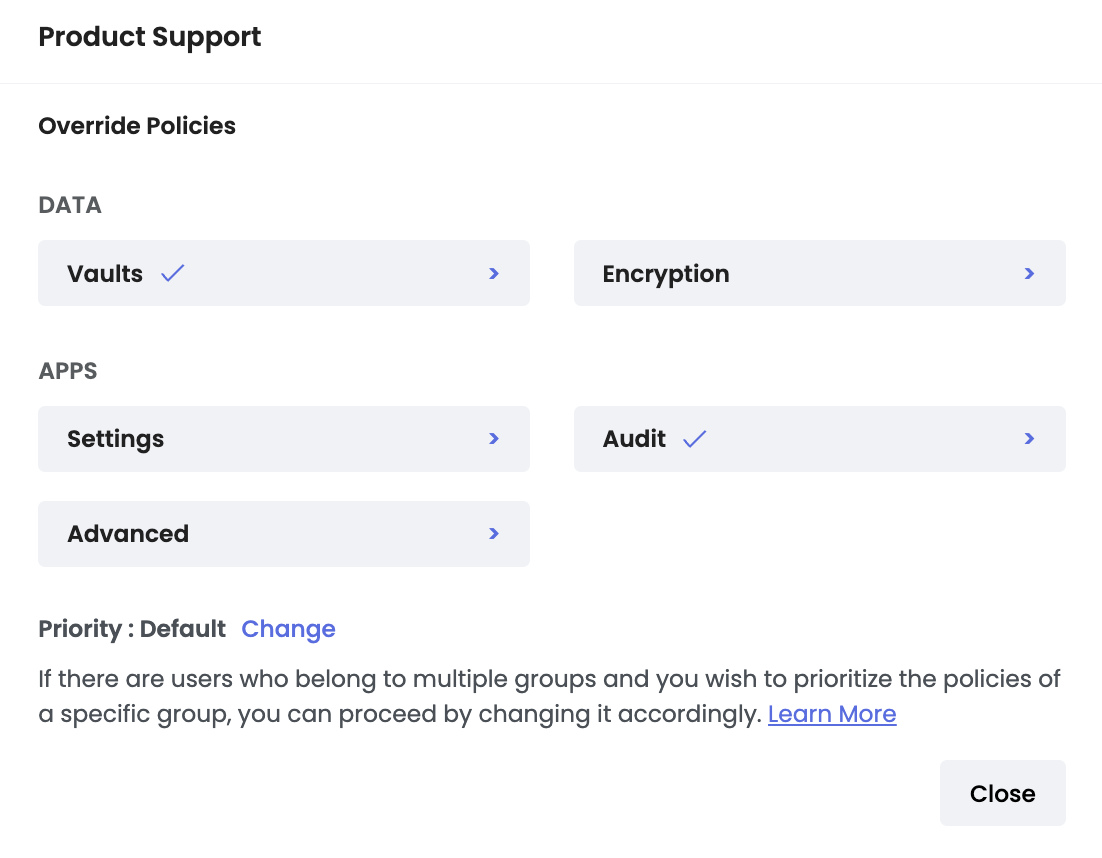
A pop-up will appear showing the available policy sections to override. Select a section to view and modify its policies.
-
Make your changes and click Override to save.
Any policy you've overridden will display a check mark in the pop-up, making it easy to see which settings differ from the organization defaults.
To revert a group's policies back to the organization defaults, click Restore Defaults in the override pop-up. This button is only active when one or more policies have been overridden.
Group Priority
When a user belongs to multiple groups that have different policy overrides, Enpass needs to know which group's policies take precedence. This is controlled by group priority.
How priority works:
A lower number means higher priority. If a user belongs to two groups with conflicting policies, the group with the lower priority number wins.
By default, all groups have a priority level of 999999 (displayed as "Default"). If multiple groups share the same priority, the most recently created group takes precedence.
Changing a Group's Priority
-
In the group's Override Policies pop-up, click Change next to the priority display.
-
Enter a new priority number.
-
Click Change to save.
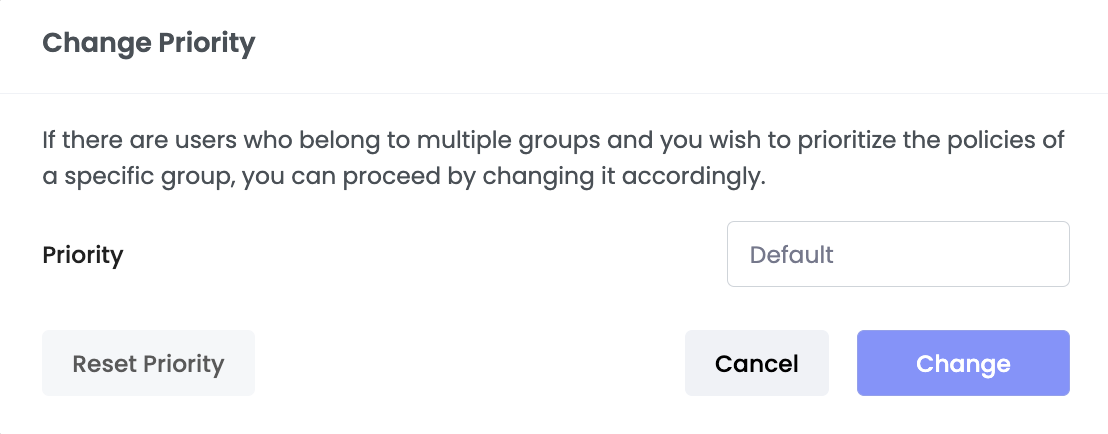
To reset a group's priority back to the default, click Reset Priority.
Common Use Cases
Restricting Most Users, Enabling Admins
Set strict organization-level defaults — deny exports, deny backups, deny copying or moving items, deny creating additional vaults. Then create a group for IT admins or vault managers with overrides that allow the specific actions they need, such as exporting data for migration or creating shared vaults.
Different Security Levels by Department
Teams handling sensitive data (such as finance or HR) might need shorter auto-lock timers, mandatory keyfiles, and no individual item sharing. Other teams with lower-risk workflows can use more relaxed settings. Create a group for each department and override only the policies that differ.
Managed vs. Self-Managed Devices
If most of your organization uses MDM-managed devices but a particular team manages their own installations, create a group for that team and enable update notifications only for them. The rest of the organization keeps notifications disabled since updates are handled centrally.
Things to Keep in Mind
Start strict, override selectively. It's safer to lock everything down at the organization level and create targeted overrides than to start permissive and try to restrict specific groups.
Keep the number of overrides manageable. The more groups with different overrides, the harder it becomes to audit and troubleshoot. Override only what genuinely needs to differ.
Review priority when adding new groups. Since new groups default to 999999, they may unintentionally take precedence over existing groups with the same default priority. Assign explicit priority numbers when multiple groups have overlapping members.
Audit group policies regularly. As teams change and people move between groups, policy overrides can become outdated. Check that each group's overrides still match their current needs.